Hey everyone, it’s Alex from the Custom Plush Team — before we dive in, let’s be real for a sec. I know how gut-wrenching it is when your one-of-a-kind custom plush tears. Maybe it’s your kid’s first ever made-to-stuffed-animal plush they designed themselves, or a custom merch plush you ordered for your brand that’s now got a gash that won’t quit. Don’t toss that thing in the trash just yet — I’ve fixed hundreds of these over the years, from tiny character plush tears to bigger ones on floor pillows, and the best way to repair a torn custom plush is way more specific than just grabbing a needle and thread from your junk drawer. No generic fabric glue, no bad DIY hacks that’ll ruin the custom embroidery or your original design. Let’s break this down like we’re chatting over coffee, no fancy jargon, just actual stuff that works for custom plush. Custom Plush
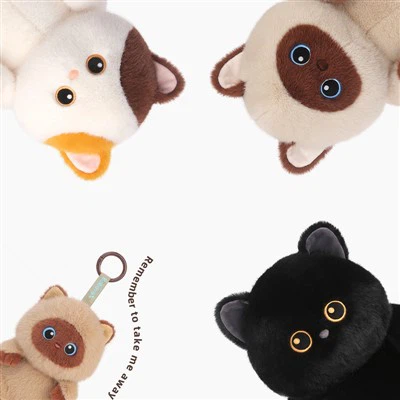
First off, let’s hit the non-negotiable prep step that most people skip — and it’s the difference between a repair that lasts 2 weeks and one that lasts for years. I can’t tell you how many times I’ve gotten a plush in to fix that someone glued wrong first, or just ripped the seam open trying to pull stuffing out. Here’s what you actually need before touching anything: grab a pair of small, sharp embroidery scissors (not kitchen scissors — they’re too bulky) and a lint roller. Wait, a lint roller? Yep. Because custom plush fabric picks up fuzz, dust, and even pet hair like crazy, and if you don’t get that off, the glue or thread won’t stick properly. Next, flip the plush inside out, very gently, and use the lint roller on the entire torn area, plus ½ inch around it. If there’s a big tear with stuffing peeking out, you might need to carefully tug some stuffing back inside so the tear is flat. Pro tip: don’t yank stuffing out — that’s how you end up with lumps where you don’t want them. If the tear’s super small (like a tiny snip from a kid’s nail), you can skip pulling stuffing, just flatten the area so it’s not bunched up. That prep step is non-negotiable, I swear by it.
Now, let’s pick the right repair method — because one size does NOT fit all custom plush. Custom stuff usually uses two main fabrics: minky (that soft, fuzzy stuff everyone loves), anti-pill fleece, and sometimes a mix for details like paw pads or embroidery patches. I’ve fixed all three, so let’s go through each scenario.
If it’s a small tear (less than 1 inch) on minky or fleece, here’s the go-to. Ditch super glue — it leaves hard, white residue that makes the plush look weird. I use a fabric adhesive specifically for stuffed animals called Toy-Tac, and it’s a game-changer. Wait until you hear the best part: it’s non-toxic, so no risk to kids or pets if they snuggle the plush right after. Apply a tiny, thin layer only to the edges of the tear, not the middle. Then press the two sides together gently, hold for 10 full seconds, and then wait 15 minutes before touching. For tiny tears, that’s all you need. I fixed a custom dog plush last month that had a ¾ inch tear on its ear, and you can barely tell it’s repaired. No lumps, no weird shine.
But if the tear is bigger — like 1 inch or more, or it’s along a seam? That’s when you need to bust out the needle and thread, but not just any thread. Never use regular sewing thread for custom plush — it’s too thin and will snap. Grab heavy-duty polyester embroidery thread, which comes in every color, so you can match the exact fabric of your plush. Wait, matching the color is key. If your plush is a bright blue minky, don’t grab white thread — you’ll see it forever. Most custom plush shops, including ours, keep swatches of every fabric and thread we use, so if you’re repairing something you ordered from a custom place, hit them up for a thread color match if you don’t have it. Now, stitch it with a ladder stitch (also called an invisible stitch) — that’s the one that hides the knots and the thread, so you can’t see the repair. I know it sounds fancy, but it’s actually pretty easy once you get the hang of it. Here’s how I do it, no fancy tutorial videos needed: insert the needle just under the fold of one side of the tear, then the exact same spot on the other side, pull it tight but not so tight it puckers the fabric, and repeat all the way down. When you get to the end, tie a tiny knot, snip the excess thread, and tuck the knot inside the plush. That’s it. For seams, it’s the same — ladder stitch along the original seam line, so it looks like it never tore. I repaired a custom group plush last year that had a 3-inch tear along its back, and the customer said no one could tell after I fixed it.
Wait, what if your custom plush has a custom embroidery patch on it, or a little felt detail that tore? Like, if the eye of your character plush fell off? Don’t grab super glue here either. Toy-Tac works for small patches, but if it’s a bigger felt piece, use a tiny dot of fabric glue and press it down. For embroidered details, if a little thread popped, just stitch it back with matching embroidery thread — super easy. I once had a customer bring a custom bear plush they’d ordered for their wedding that had its name embroidered on the paw, and a little part of the “n” had pulled out. I stitched it back in 5 minutes, no one even noticed until I pointed it out.
Now, the mistakes everyone makes that turn a minor repair into a total plush disaster. First, using too much glue. I can’t stress this enough — less is more. If you put a glob of glue on, it’ll seep through the fabric, leave a hard spot, and even get on other parts of the plush. We once had a customer send a plush back they’d repaired themselves with too much super glue, and it made the entire ear stiff and discolored — we had to replace the whole ear for them. Second, not matching the thread color. I’ve seen people use black thread on white plush, and you can see the repair a mile away. Third, yanking stuffing out to flatten the tear. That leaves lumpy spots, and you’ll be stuffing it back in for days. Fourth, rushing the glue. If you don’t hold it for 10 seconds, the edges will pull apart, and you’ll have to redo it. Take 2 extra seconds, it’s worth it.
Wait, and what if the tear is on a super high-traffic spot — like the bottom of a custom plush that’s sitting on a shelf, or a paw that gets a lot of use? For those, I always add a tiny, extra stitch to the edge of the repair, just to make it a little more durable. Not too many, so you don’t ruin the look, but enough so it doesn’t tear again. It’s a trick we use for custom plush when we’re making them, actually — we reinforce high-wear spots like paws and ears with a hidden stitch, so they hold up longer.
Here’s the most important part: if you’re not comfortable doing it yourself, don’t force it. We get tons of requests from people who tried to fix their custom plush and made it way worse — either they ripped a bigger tear, or they left weird stitch marks all over it. If that’s you, send it back to the custom plush shop you ordered from, if you still have their info. Most shops (including us) offer repair services for custom plush, even if you ordered it months ago. We charge a small flat fee, and we use the exact same materials we used to make it, so the repair blends in perfectly. We even keep fabric swatches on file for every order that comes through, so we never have to guess what thread or fabric to use.
At the end of the day, custom plush isn’t just a toy — it’s a memory. It’s the plush your kid designed for their birthday, it’s the merch plush for your favorite team, it’s the custom plush of your pet that you ordered after they passed away. You don’t want to toss that because of a tiny tear. If you’ve got a custom plush that’s torn, don’t hesitate to reach out to us at the Custom Plush Team to talk about repair or even ordering a new one if it’s beyond fixing. We love helping people keep their favorite plush around for as long as possible.
Now, before I go, let’s wrap up the key takeaways so you don’t forget: prep is everything (lint roll, flatten the tear, no yanking stuffing), pick the right method (Toy-Tac for small minky/fleece tears, ladder stitch for bigger ones or seams), avoid common mistakes (too much glue, wrong thread), and if you mess it up, hit up the custom shop you ordered from — they’re the only ones with the exact materials to make it look good as new.

Happy snuggling, everyone — and keep those plushies intact!
Custom Plush Pillow References:
- The Toy Association. (2022). Best Practices for Stuffed Animal Repair.
- Textile Institute. (2021. Adhesive and Stitch Techniques for Soft Toy Restoration.
- Custom Stuffed Animal Association. (2023. Care and Repair Guidelines for Made-to-Order Plush.
Yangzhou Beyman Toys Co., Ltd.
We are one of the most professional custom plush manufacturers and suppliers in China, specialized in providing high quality custom service and OEM&ODM service. We warmly welcome you to wholesale bulk custom plush made in China here from our factory.
Address: Room 305, North Bldg, 4 Bldg, Chuangfu Factory, No. 158, Jiannan Road, Hi-Tech Development Zone, Yangzhou City, Jiangsu Province, China.
E-mail: janzen3@beyman.cn
WebSite: https://www.plushtoyschina.com/
